
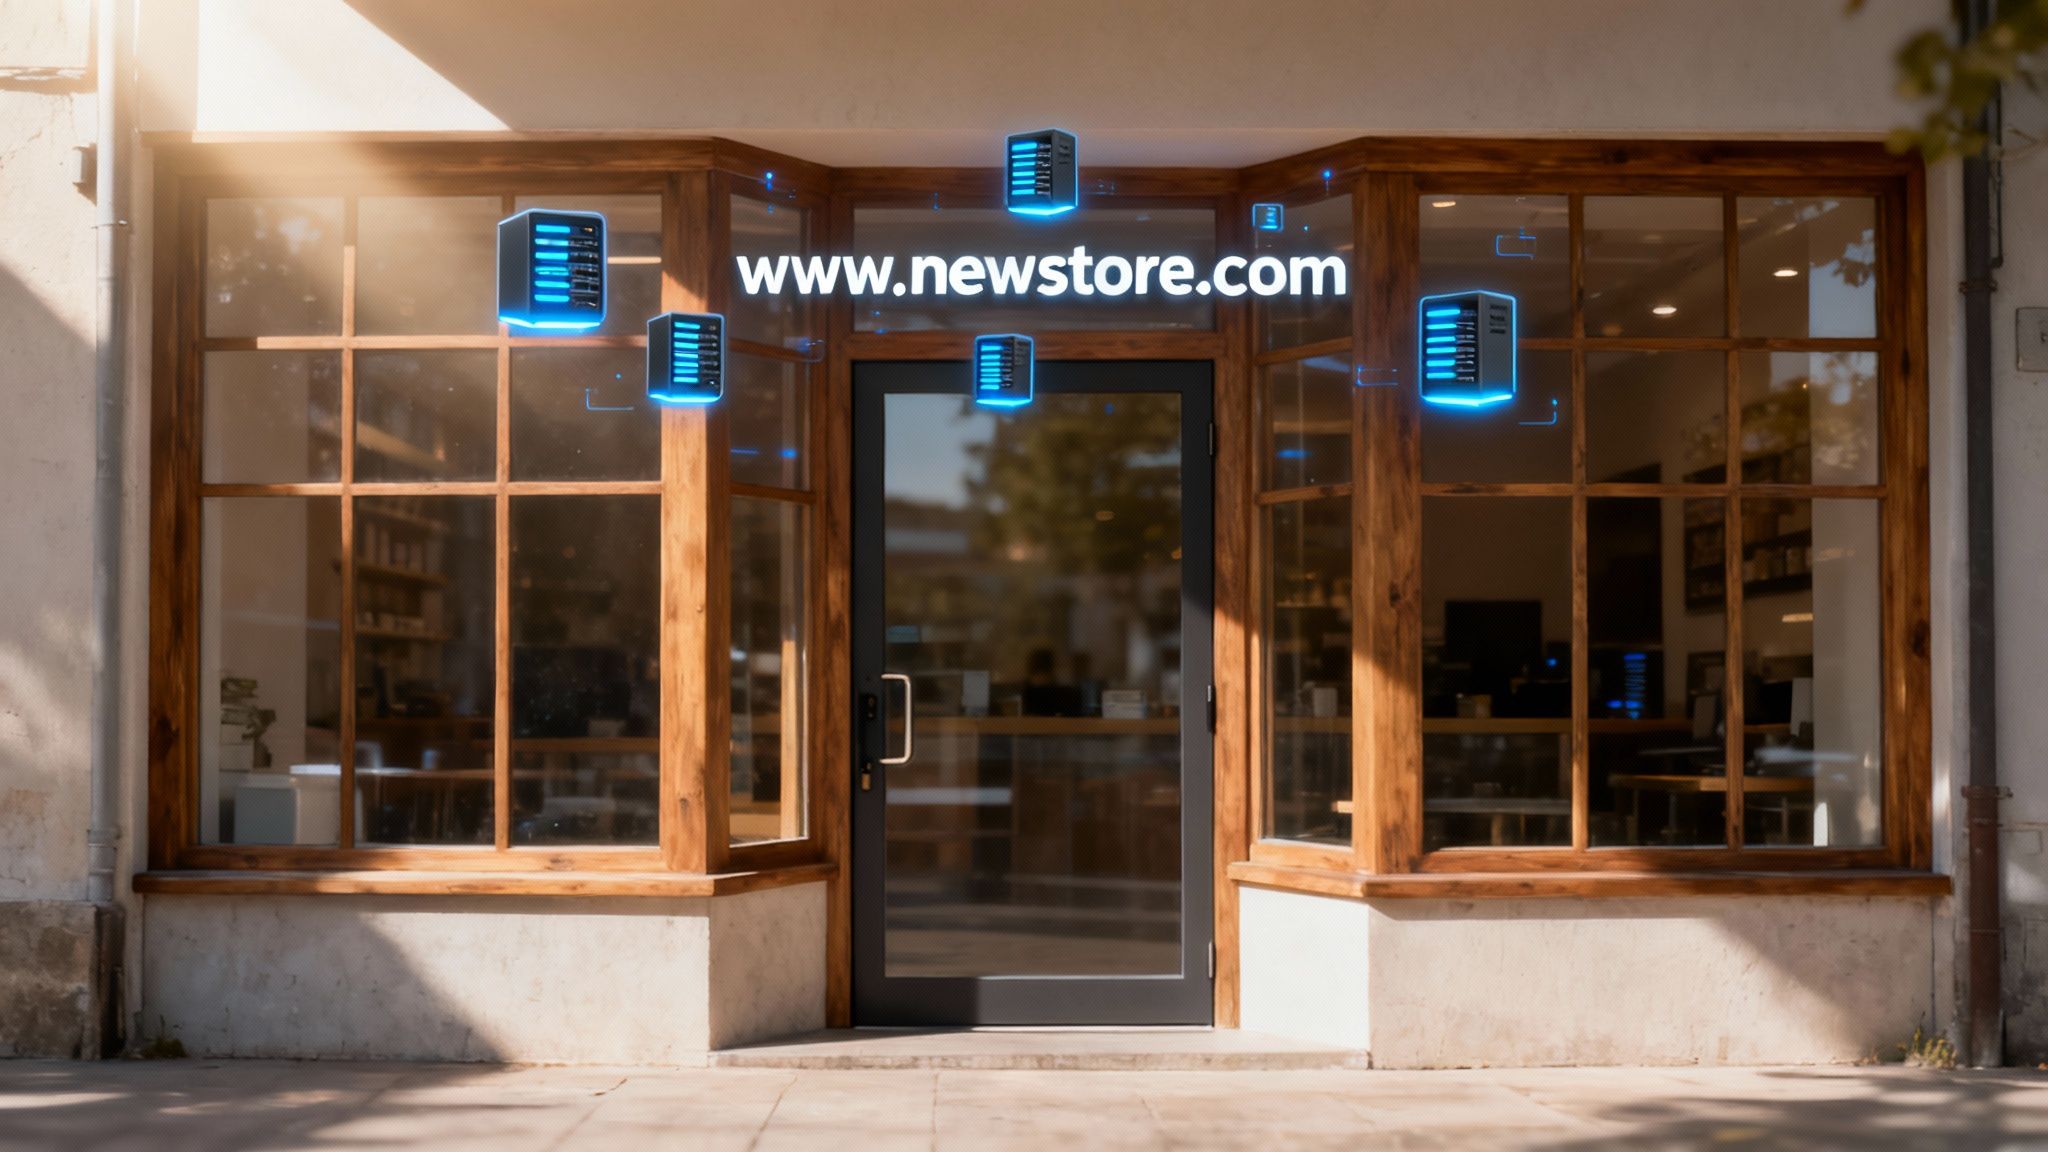
So, you've built a website. The creative part is done, and now it's time to share it with the world. This is where many people feel a bit of technical anxiety, but I promise it's more about connecting the dots than complex coding.
Getting your website live really just comes down to a few key pieces. Think of it like setting up a new physical store: you need a unique street address, a rented storefront, and all your products ready to go on the shelves. In the digital world, it’s not much different.
Before we jump into the "how-to," let's get our bearings. A little bit of planning here saves a lot of headaches later. Understanding what each part does helps you make smarter choices, like picking the right hosting plan from the get-go instead of realizing you need to upgrade three months down the line. A smooth launch starts with knowing the landscape.
The Three Pillars of a Live Website
Every single website you've ever visited, from Google to the smallest local blog, is built on the same three foundational elements. Getting these right is non-negotiable for a stable and accessible online presence.
Here's the quick rundown of what you absolutely need:
- A Domain Name: This is your website's unique address, like
yourcompany.com. It’s the memorable name people type into their browser to find you. - Web Hosting: This is the service that rents you space on a server to store all your website's files. It’s the engine that keeps your site running and accessible 24/7.
- Your Website Files: This is the "stuff" of your site, the code, text, images, and videos that your visitors will see and interact with.
Of course, the technical bits are only half the story. The best website in the world won't succeed if it doesn't connect with the right people. That’s why having a solid grasp of your audience is critical before you launch. If you haven't already, check out our guide on https://digitallotusmarketing.com/how-to-create-buyer-personas/ to get that sorted. For a broader look at the entire process, this guide on how to publish a website is a fantastic resource.
Core Components for Publishing Your Website
To make this even clearer, here’s a quick-glance table breaking down the core components with a simple analogy for each.
| Component | What It Is | Real-World Analogy |
|---|---|---|
| Domain Name | The unique web address for your site (e.g., yourbrand.com). | The street address of your physical store. |
| Web Hosting | The server space where your website files are stored and served. | The physical building or storefront you rent. |
| Website Files | The HTML, CSS, images, and content that make up your site. | The products, shelves, and decor inside your store. |
| DNS | The system that connects your domain name to your hosting server. | The GPS system that directs customers to your store's address. |
Having a clear handle on these four elements, domain, hosting, files, and DNS, is the key to a successful launch.
It's amazing how much things have changed. Back in 2010, getting online was a real hurdle. Now, the barriers to entry have practically vanished. What was once a niche activity is now mainstream, with internet penetration soaring past 70% in many major economies by 2025. This explosion is largely thanks to user-friendly tools that let anyone build and launch a site without writing a single line of code. You can dive deeper into these trends with the global digital overview from DataReportal.
Choosing and Registering Your Domain Name
Your domain name is your digital address. It's often the very first thing a visitor sees. Think of it as your piece of real estate on the web. It needs to be memorable, easy to type, and a true reflection of your brand. Getting this right isn't just a small step; it's about securing a core part of your online identity.
A great domain name just feels right. It's simple and intuitive. For a bakery, freshbakes.com is crystal clear and easy to remember. Something like fresh-bakes-from-the-oven-4u.com, on the other hand, is a mouthful. It’s clumsy, hard to say out loud, and a nightmare to type correctly.
My advice? Stick to names that are short. Ditch the hyphens and numbers if you can. And always, always make it easy to spell.
Finding the Perfect Name and Extension
The bit after the dot, like .com or .org, is your domain extension, and it sends its own message. While .com is still the undisputed champion for credibility, plenty of other options have become mainstream and can work just as well.
- .com: This is the most recognized and trusted extension. If you can get it, do. It’s ideal for almost any business.
- .co: A popular alternative to .com, often snapped up by startups and modern tech companies.
- .io or .ai: These are huge in the tech scene. They instantly signal a connection to technology or artificial intelligence.
- .org: This one is traditionally the home of non-profits and community organizations.
What if your first choice for a .com is already taken? Don't sweat it. You can often get creative by adding a simple, relevant word. If evergreen.com is gone, you could try something like evergreenlandscaping.com or getevergreen.com. This way, your brand name stays front and center while still giving you a unique address.
The key is to think long-term. Find a name that aligns with where your brand is headed. What sounds clever today might just be confusing tomorrow. Your domain should be built to last, just like your business.
Using a Domain Registrar the Smart Way
Once you've landed on the perfect name, you need to register it through a domain registrar. This is the company that officially reserves that name for you. When you start comparing registrars, don't get lured in by a flashy first-year price.
Here's what I've learned really matters:
- Transparent Pricing: Be wary of those super-low introductory prices that shoot up dramatically at renewal. A trustworthy registrar is upfront about what you'll be paying a year from now.
- Privacy Protection: Most good registrars offer WHOIS privacy. This service hides your personal contact information (like your name and address) from a public database. It's a must-have for preventing spam and protecting your privacy.
- User-Friendly Management: You'll eventually need to point your domain to your web host. A clean, intuitive dashboard makes this whole process much less of a headache.
Choosing your web address is a foundational step in learning how to publish a website. It sets the tone for your brand's entire online presence. For more detailed guidance on picking a name that works for your brand and SEO, check out these tips on how to choose a domain name effectively.
Selecting the Right Web Hosting Plan
Think of web hosting as the plot of land where you’ll build your website. Picking the right one is a big deal. It directly affects your site's speed, how secure it is, and whether it can handle a sudden rush of visitors. When you start shopping around, you'll be hit with a ton of options, but they really boil down to three main categories.
Each type of hosting strikes a different balance between cost, performance, and the amount of technical control you have. A small personal blog has completely different needs than a big e-commerce store gearing up for a Black Friday sale. Getting a handle on these differences is the key to making a smart choice without blowing your budget on power you don't need.
The infographic below breaks down the three main hosting types, comparing them on things like cost, performance, and how easily they can grow with you.
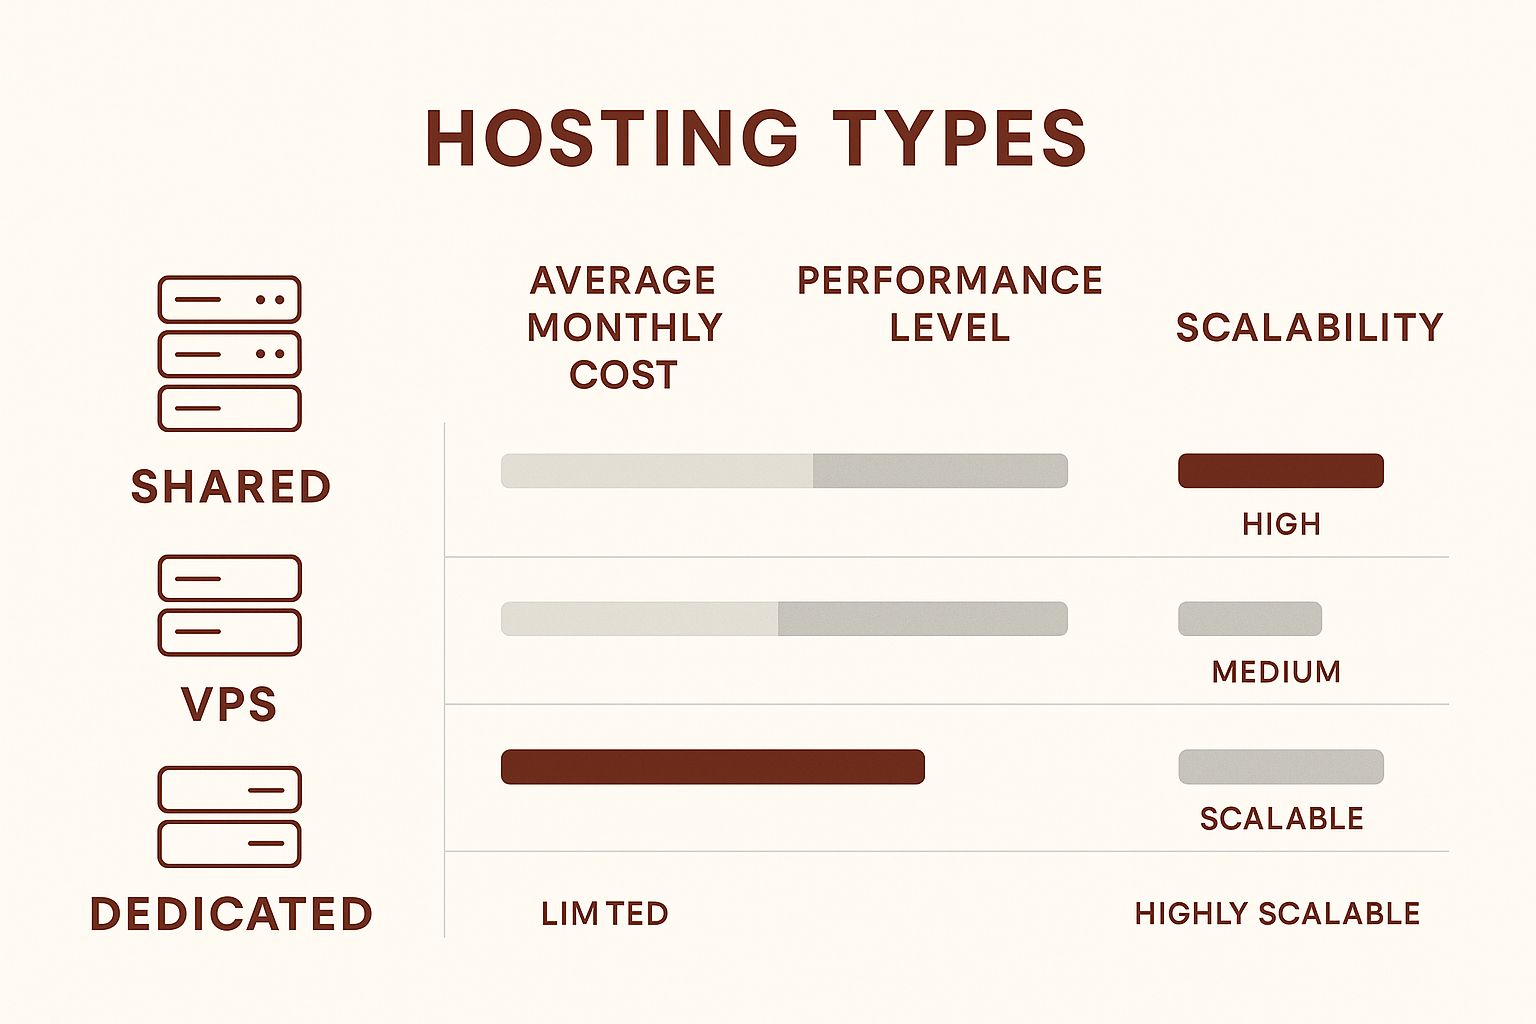
As you can see, there's a clear trade-off. As you climb the ladder from shared to dedicated hosting, both the price tag and the performance get a serious boost.
To help you decide, here’s a quick comparison of the most common web hosting types.
Comparing Web Hosting Types
| Hosting Type | Best For | Typical Cost | Technical Skill Needed |
|---|---|---|---|
| Shared Hosting | New blogs, portfolios, small business sites with low traffic. | $3 – $15 / month | Low. Very beginner-friendly. |
| VPS Hosting | Growing businesses, online stores, sites with moderate traffic. | $20 – $80 / month | Medium. Requires some server management knowledge. |
| Dedicated Hosting | Large e-commerce, high-traffic media sites, complex web apps. | $80 – $300+ / month | High. Full server control and responsibility. |
Each of these hosting plans serves a different purpose. Let's dig into what that means for you in the real world.
Shared Hosting: The Friendly Neighborhood
Shared hosting is hands-down the most popular and affordable way to get a website online, which makes it perfect if you're just starting out. In this setup, your website lives on a server alongside hundreds, or even thousands, of other sites. You're all sharing the server's resources like its processing power and memory, which is what keeps the cost so low.
I like to think of it as living in an apartment building. You have your own private apartment, but you share the building’s main utilities like water and electricity. If one neighbor suddenly starts using a massive amount of resources, it can sometimes affect everyone else.
This plan is a great fit for:
- New blogs finding their footing.
- Personal portfolio sites to showcase your work.
- Small business brochure websites that see low to moderate traffic.
Shared hosting is a fantastic entry point. Just a heads-up on those "unlimited" storage and bandwidth offers. They almost always come with a "fair use" policy. If your site starts hogging resources and slowing down others, your provider will likely nudge you to upgrade.
VPS Hosting: Your Own Private Floor
A Virtual Private Server, or VPS, is the logical next step up. While you're still sharing a physical server with other people, you get your own dedicated slice of its resources. This is more like owning a condo in that same apartment building. You have your own guaranteed space and utilities that aren't impacted by what your neighbors are doing.
That isolation is huge. A traffic spike on another website won't slow yours down one bit. VPS hosting gives you a significant performance boost and much more control over your server environment, making it a fantastic middle-ground for websites that are starting to grow. It really strikes a nice balance between the low cost of shared hosting and the raw power of a dedicated server.
Dedicated Hosting: The Whole Building to Yourself
Finally, we have dedicated hosting, which is exactly what it sounds like. You rent an entire physical server just for your website. You get all the resources, total control over the software, and the highest level of performance and security possible. This is the penthouse suite of the hosting world.
This option is built for high-stakes websites where downtime or slow performance simply isn't an option. We're talking about large e-commerce stores processing thousands of transactions, popular news sites with millions of monthly visitors, or complex web applications with heavy resource demands. It's definitely the most expensive route, but for the right project, the investment is absolutely essential.
Getting Your Domain and Hosting to Talk to Each Other
Alright, you've got your domain name and your hosting plan. Now for the crucial part: making them work together. This is where we connect your website's address (the domain) to its new home on the internet (the hosting server). Think of it as putting your new business address into Google Maps so customers can find you.
To do this, we'll dip our toes into something called the Domain Name System, or DNS. It sounds technical, but the concept is simple. DNS is basically the internet's giant address book. When someone types your domain into their browser, DNS is what looks it up, finds the correct server, and directs them to your site. It’s the invisible plumbing that makes the web work.

Pointing Your Domain to Your Host
The key to connecting everything lies in updating your nameservers. Your hosting company gives you these special addresses, and your job is to plug them into your domain registrar’s settings. This single action tells the internet where to find your website's files.
Here's a no-fluff breakdown of what you need to do:
- Grab Your Nameservers: First, find the nameserver addresses from your hosting provider. They usually send these in a welcome email or display them clearly on your hosting dashboard. You're typically looking for at least two, and they'll look something like
ns1.hostname.comandns2.hostname.com. - Head to Your Domain Registrar: Next, log in to the account where you purchased your domain (like GoDaddy or Namecheap).
- Find the DNS Controls: Once you're in, look for a section called "DNS Management," "Manage Nameservers," or something similar. Every registrar's layout is different, but this option is a standard feature.
- Swap Them Out: You'll see the registrar's default nameservers. All you have to do is replace them with the new ones from your web host and hit save.
That’s it. You've just told your domain registrar to let your new web host manage all the traffic for that domain.
Don't let the jargon scare you. This is one of those steps that seems way more complicated than it is. You're just copying a couple of lines of text from one website and pasting them into another. Trust me, it’s a lot simpler than it sounds.
The Waiting Game: DNS Propagation
One thing to know is that this change isn't instantaneous. It takes time for the new information to travel across the internet's global network. This process is called DNS propagation.
Essentially, servers all over the world need to update their records with your new information. This can take anywhere from a few minutes to 48 hours, although it’s usually on the faster side. During this propagation period, your site might be visible to some visitors but not others.
My advice? Don’t panic if your site doesn’t appear right away. Just be patient and give it some time. It’s a completely normal part of the process. I usually check back in a few hours, but I don't start worrying or troubleshooting until a full day has passed.
Uploading Your Website Files
Alright, your domain name is pointing to your hosting server. Now for the exciting part: actually putting your website on the internet for everyone to see. This is where your creation moves from a local folder on your computer to a live, public server. Think of it as moving everything from your workshop into your brand-new storefront.
The good news? You don't need to be a coding wizard to get this done. How you'll do it really just boils down to the way your site was built in the first place.
The Two Paths to Get Your Site Live
Generally, you'll go one of two routes. If your website is a collection of custom files like HTML, CSS, JavaScript, and images, you'll use what's called an FTP client. On the other hand, if you're using a popular platform like WordPress, it’s usually as simple as a one-click installation from your hosting dashboard.
Let's walk through what each of these looks like in practice.
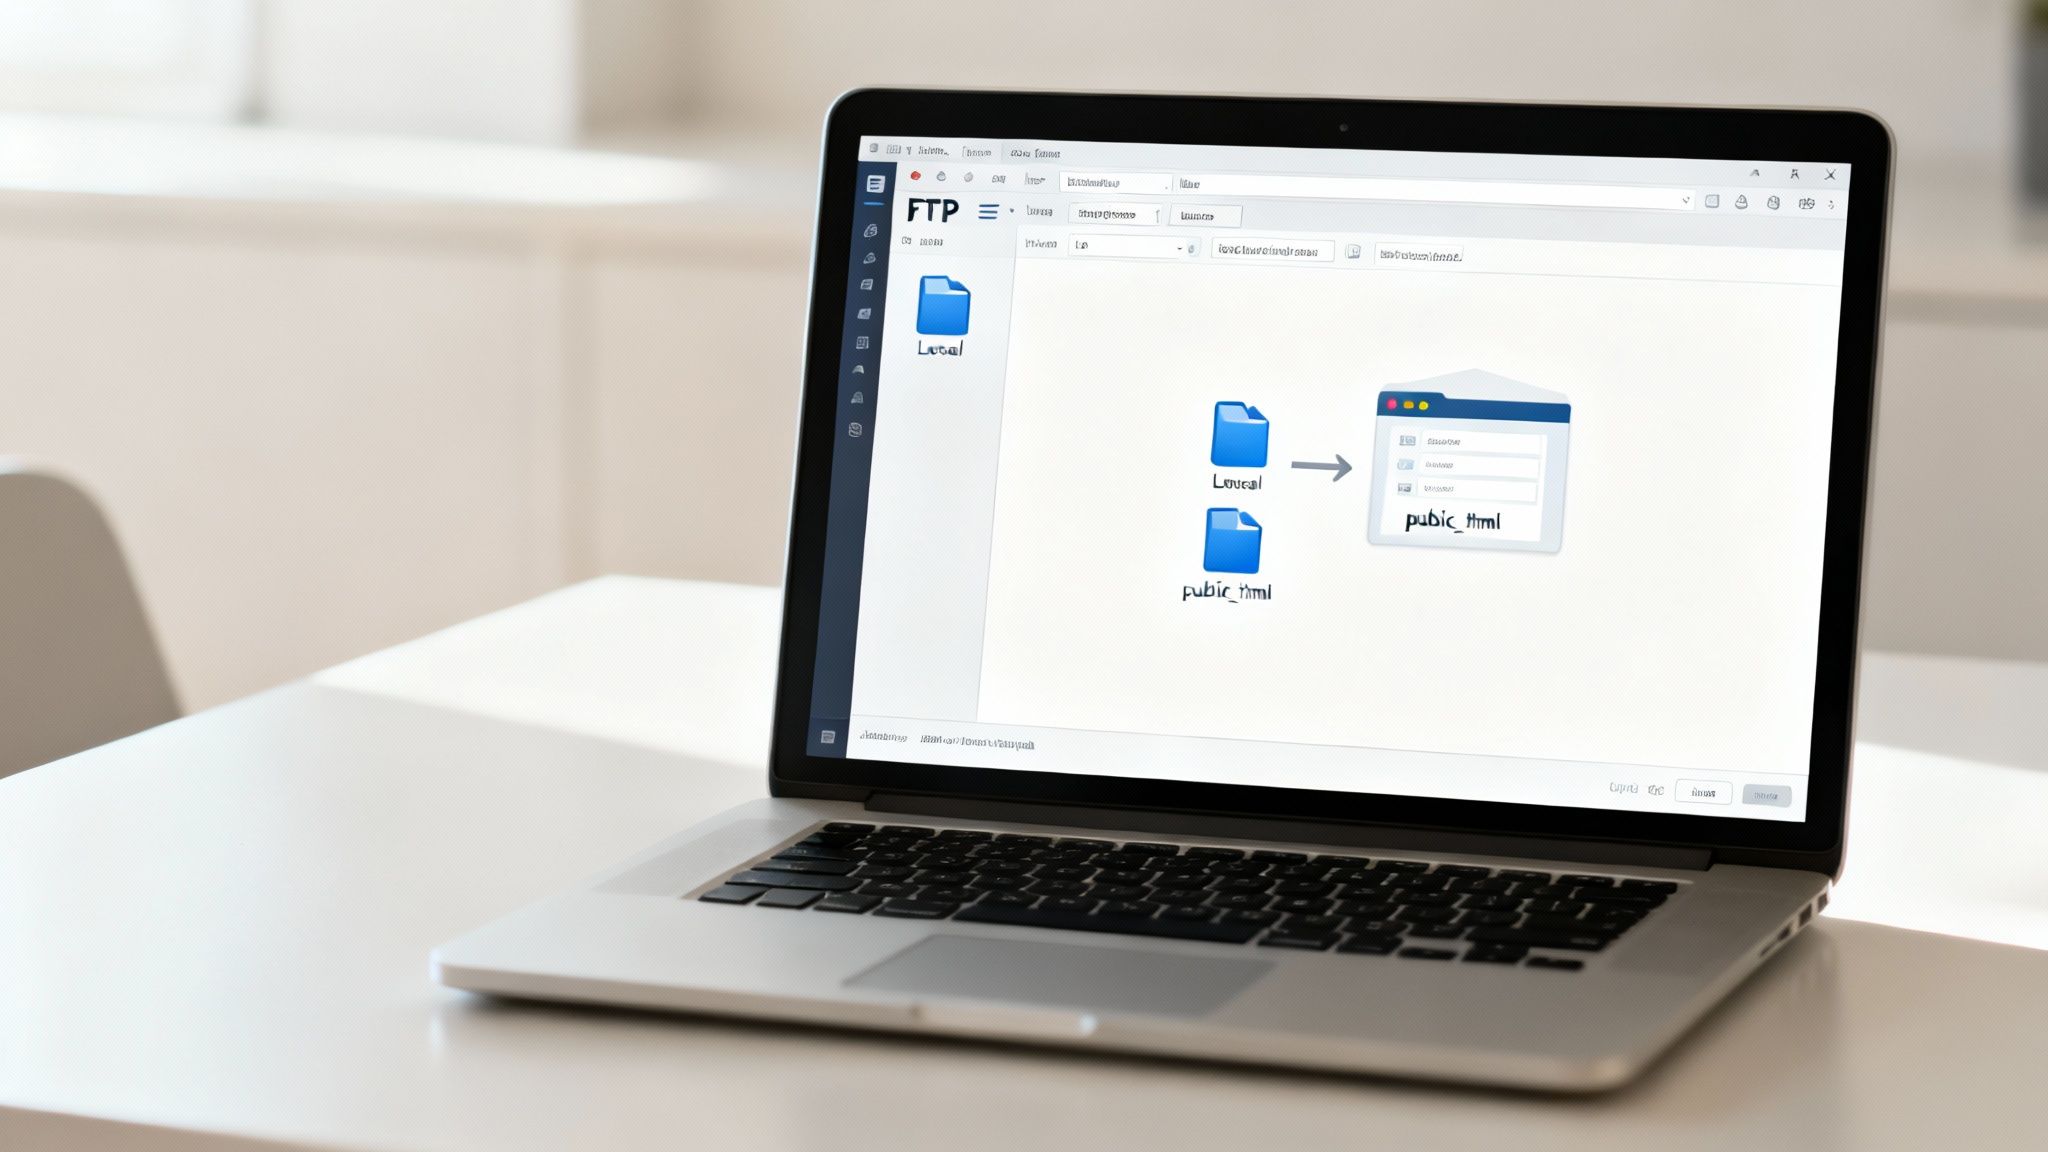
Using an FTP Client for Custom-Coded Sites
Got a folder full of website files ready to go on your desktop? You need a bridge to get them from your machine to the web server, and that bridge is an FTP (File Transfer Protocol) client. It's basically a special file manager that lets you see your computer's files on one side and your server's files on the other.
A fantastic, free tool for this is FileZilla. Once you have it installed, the process is pretty straightforward:
- Grab Your Login Info: Your hosting company provides your FTP credentials. Look for a hostname (the server address), a username, and a password in your welcome email or hosting dashboard.
- Connect to the Server: Punch those details into FileZilla to establish the connection.
- Locate the Public Folder: Once you're in, you need to find the right destination. This is the most critical step. The folder is almost always named
public_htmlor sometimeswww. This is your website's public "root" directory. - Drag, Drop, and Go Live: Now, just select all your website files from the local panel (your computer) and drag them over to the remote panel (the
public_htmlfolder on your server).
A Quick Pro-Tip: Pay close attention to your file structure. The main page of your website should be named
index.html. When you place that file insidepublic_html, it's the first thing visitors will see when they type in your domain. A clean file structure here will save you headaches later.
The "Easy Button": One-Click Installs for CMS Platforms
If you've decided to build with WordPress, which powers over 43% of all websites, your life just got a lot easier. Figuring out how to publish a website in this case rarely involves manual file transfers.
Modern hosting providers know how popular these platforms are and have built streamlined installers right into their control panels (like cPanel or a custom dashboard). Instead of wrestling with FTP, you’ll see an icon that says something like "Install WordPress" or "App Installer."
You just click that, select the domain you want to install it on, and fill out a few basic fields like an admin username and password. The system takes care of everything else, from setting up the complex file structure to creating the database your site needs to function.
This method is a game-changer. You can have a fully functional, powerful WordPress site up and running in a matter of minutes, letting you jump straight into creating content and designing your pages.
Your Pre-Launch Final Checklist
You’re so close to the finish line! Before you pull the trigger and officially go live, it’s worth taking a moment for one last pre-flight check. This isn't about second-guessing your design. It's about catching those small, easy-to-miss details that can make a huge difference in a visitor's first impression.
https://www.youtube.com/embed/ZC37jl0lRF8
Think of it as the final polish on a new car. A single broken link or a nagging typo can make an otherwise professional site feel sloppy. Trust me, a few minutes of review now can save you from a lot of "oops" moments later.
Test Every Clickable Element
I can't tell you how many times I've seen a beautiful new site launch with a broken link right on the homepage. It’s probably the most common launch-day hiccup. The only way to be sure is to manually click through every single navigation item, button, and in-text link. Don't forget the boring stuff like the links in your footer or the social media icons.
While you're clicking around, test anything that requires user interaction:
- Contact Forms: Go ahead and fill out every form on your site. Did the success message pop up? More importantly, did the submission actually land in your inbox? A non-working form is a lost lead, plain and simple.
- Email Subscription Boxes: Try signing up for your own newsletter. This lets you confirm the entire process works exactly as you expect it to for a new subscriber.
Content and Design Polish
Next up, put on your editor's hat. My favorite trick for this is to read every single word on your site out loud. It feels a bit silly, but it's the best way to catch awkward phrasing and typos that your brain automatically corrects when you read silently.
A polished website signals trustworthiness. Simple mistakes like typos or broken links can erode a user's confidence in your brand before they've even had a chance to engage with your product or service.
It's also absolutely critical to check how your site looks on different devices. What looks incredible on your big desktop monitor might be a jumbled mess on a small smartphone screen. You can use your browser’s built-in developer tools to simulate various screen sizes, but nothing beats grabbing your own phone and a tablet to see it for real. For more on this, our guide to small business website design tips has some great pointers.
Final Technical Checks
With all the user-facing elements looking sharp, a couple of quick technical steps will set you up for success right out of the gate.
First, make sure you have an analytics tool installed. Setting up a free tool like Google Analytics from day one is non-negotiable. It’s how you’ll understand how visitors find your site and what they do once they arrive, invaluable data for making improvements down the road.
Second, give the search engines a little nudge. You'll want to submit your sitemap, which is basically a map of all the pages on your website. Submitting it through Google Search Console tells Google exactly what content you have ready for them to index. This is a key step that helps your new pages start showing up in search results much faster.
Common Website Launch Questions
It's completely normal to have a few nagging questions as you approach the finish line. After helping countless clients go live, I've noticed a few pop up again and again.
How Long Until My Website Is Live Everywhere?
This is probably the most common one. You’ve just hit the "publish" button, and you're eager to see your site out in the wild.
The short answer is that DNS changes, the process of telling the global internet where your new site lives, can take up to 48 hours to fully "propagate." In reality, you'll often see it live much faster, sometimes within an hour or two. So, don't panic if your friend across the country can't pull it up right away. Just give it some time.
Why Isn't My Site on Google Yet?
This question usually follows a few days after launch. You've typed your business name into Google, and… nothing. What gives?
Search engines like Google need time to discover and index new websites. They don't know your site exists the second it goes live. The best way to give them a heads-up is to submit a sitemap through Google Search Console. Even then, it's a waiting game. Patience is key here.
Can I Make Changes After Going Live?
Absolutely! In fact, you should. Thinking of your website as a finished product is a mistake. It's a living project that should evolve with your business.
Once your site is published, you can and should continue to:
- Update your content
- Fix any bugs that crop up
- Add new features or pages
A website that's regularly updated stays fresh, performs better, and keeps your audience engaged.
Ready to launch a website that drives real results for your business? The experts at Digital Lotus Marketing specialize in creating powerful online presences that attract local customers. Learn more about our web design services.